New Mac Dark Mode: Activate with only one click!
09/26/2018 (2786x read)

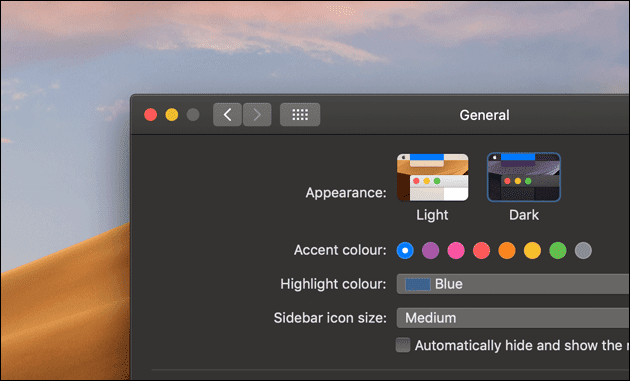
With macOS 10.14 („Mojave“), Apple included the all new Dark Mode which makes it easier to use the Mac in the dark. You can easily switch from the normal display appearance to the Dark Mode by opening the „System Preferences“. Therefore, click either on it’s icon in the doc at the bottom or click on the Apple logo at the top left and select „System Preferences“ from the menu.
In the new window click on „General“ and select „Dark“ in the „Appearance“ section. But there is another way, to switch even faster with only one click to the dark screen: Build your one little app with only five lines of code and no programming skills needed (Scroll down for our tutorial)!
How to activate dark mode
This tutorial video shows how to open the Mac’s settings and change the screen from light to dark and back using Apple’s system preferences:
Script: Activate the dark mode with one click
Even faster: Copy this code and save your own „dark mode“ app: This way you can just click (if the app is put in the dock) or doubleclick on the app to switch to the new Dark Mode or back to the lighter screen-mode.

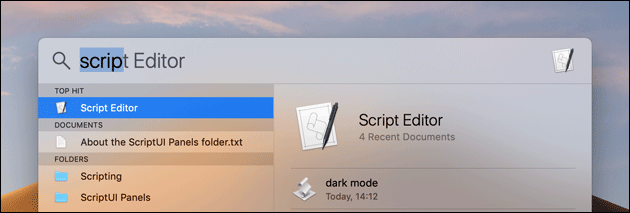
First, press cmd + space to open the Spotlight search on your Mac. Type „script editor“ to start Apple’s editor, make sure it is set to „AppleScript“ and paste these five lines of code:
tell application "System Events"
	tell appearance preferences
		set dark mode to not dark mode
	end tell
end tell
Now save your „Dark Mode“ program and set the app’s file format to „Application“. Now you can drag that app inside the Mac’s dock and click it everytime you want to activate the Dark Mode or switch back to the normal mode!

