Activate SSH on a Raspberry Pi!
06/03/2019 (3525x read)
With SSH (Secure Shell) you can control your Raspberry Pi remotely over the network without a monitor and keyboard attached: Just open your SSH application on your computer and connect with the Raspberry (click here to learn how to connect with the Raspberry via SSH!). For safety reasons, SSH is disabled by default but there are two easy ways to enable it!
Enable SSH on a Raspberry Pi without a monitor
You can simply copy an empty text-file on the microSD card: This will enable SSH! After downloading the Raspian image and installing it on the Raspberry, create a new and empty text document on your computer:
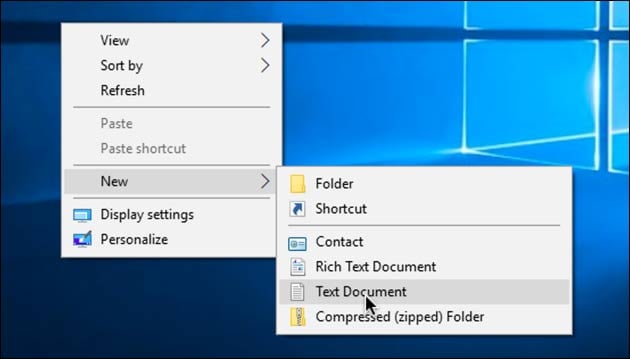
Now you just have to rename it: The file-name has to be „SSH“, without a file-extension:

Now you just have to copy this empty text file onto the SD card with your Raspbian operating system: After inserting it into the Raspberry, it will enable the SSH server at the first boot!
Enable SSH on the Raspberry itself
If you are working on the Raspberry with keyboard and monitor attached, just open a terminal window and type this command:
sudo raspi-config
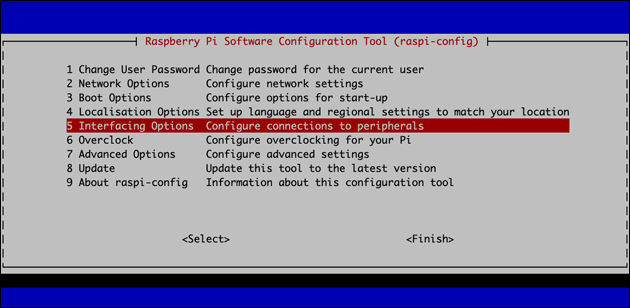
This will open the Raspberry’s setting. Here, select „Interfacing Options“:
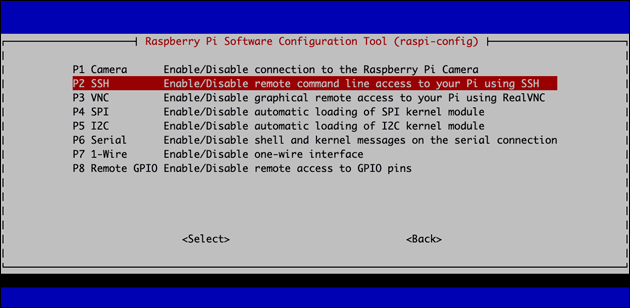
Now select SSH:
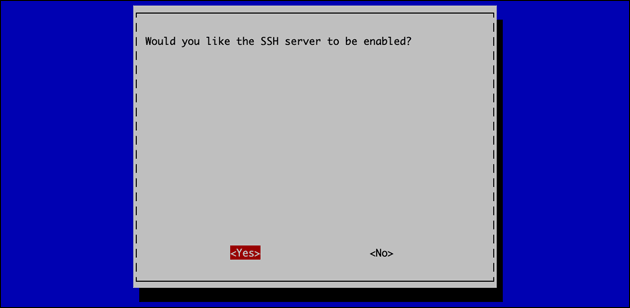
…and enable the SSH server:
You can close the settings by selecting „Finsish“ and reboot the Raspberry: After the reboot SSH should be enabled and you can access the Pi via the network.

