Use your notebook as a monitor for a 2nd PC with this trick!
11/24/2024 (849x read)

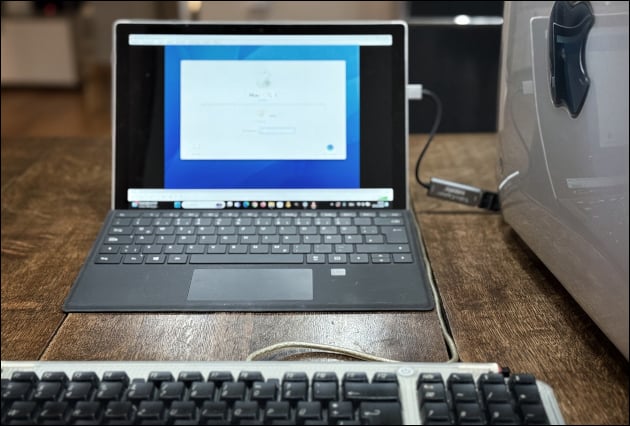
To save space on your desk, you can use your notebook as a monitor for a second PC: This way you only need one screen and have everything in view. Although you can’t connect the second PC to the notebook’s HDMI port to see its screen, this $20 trick is great if you only need to use the second PC occasionally (like to print documents, scan or run a specific program).
Our setup for using the notebook as a PC screen:
- A cable from the PC to the notebook: If the PC has an HDMI output on the graphics card, all you need is a standard HDMI cable.
- If it has a DVI output, you need a DVI-to-HDMI cable
- If it has a Display Port output, you need a DP-to-HDMI cable
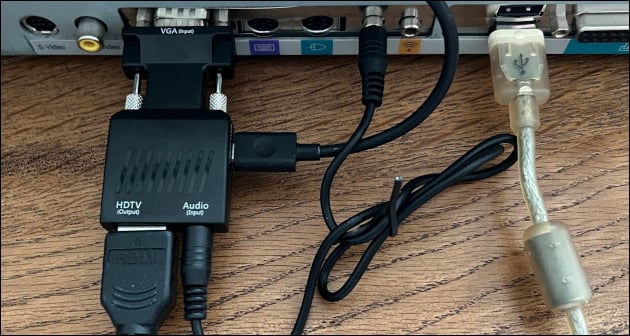
- If it has a VGA output, you need an active VGA-to-HDMI converter and an HDMI cable
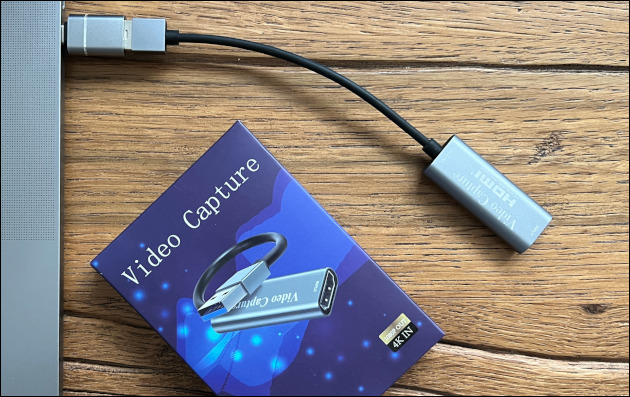
- An HDMI-to-USB converter (also known as a capture card): This will convert the video signal and act as a camera on your laptop.
- A program to display the image from the capture card: For example the free VLC Player, the Windows camera app or Apple Quicktime

Connect a notebook to a second notebook
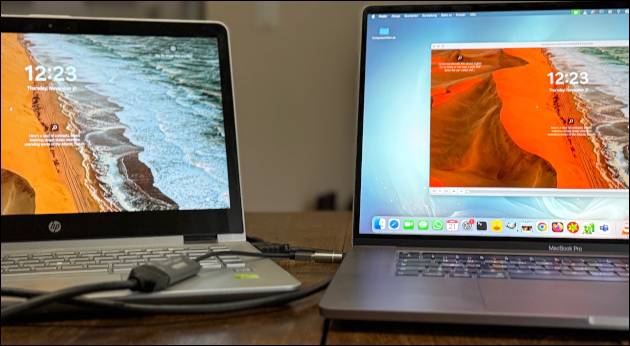
If you have a laptop with a faulty screen or simply want to view or record the screen of a second laptop, you can use an HDMI-to-USB adapter (also known as a video capture card) to display the image from one laptop on the other. This can work even if the first laptop has a faulty video card rather than a faulty display: It is important, however, that the operating system still starts. If Apple MacBook internal components are damaged and the device will not start, FireWire target disc mode can be activated to access the data.
Tip: The HDMI-to-USB converter we used costs only $20

You cannot connect the two computers directly using an HDMI cable: The HDMI port on laptops is a video output port only. To display the video signal from the faulty laptop, you need a converter that transfers the image from the computer via USB. You can view the incoming signal from the USB capture card (or HDMI-to-USB converter) as an external camera and play back the image using the Windows Camera application or the free VLC player. This means that the image from the faulty laptop is available in a window or as a full screen on the second laptop.
The capture card we used delivers a clean and sharp image, but has a slight delay (just under a second). This is fine for occasional access to data or applications, but can be annoying when working continuously. More expensive capture cards advertise very low latency times, which can almost cancel out the delay.
How to connect a PC to a notebook display
The notebook’s display port (VGA, HDMI, mini-HDMI, Thunderbolt or via USB-C) is always an output port only: It’s not possible to connect a second PC and display its image on the notebook, but this trick works if the notebook has USB-C or blue USB3 ports (older USB ports would be too slow for good video quality).

Instead of only an HDMI cable, you’ll also need a HDMI-to-USB converter which needs to have its own video capture chips: These chips convert the incoming image signal from HDMI and allows the video image to be used like a webcam under Windows and MacOS: the included camera application (Windows) or Quicktime (Mac) can then be used to display the image from the second PC; another option is the free VLC player. HDMI-to-USB video capture cards are available for between $20 and $300.
The quality at the highest setting is good enough for displaying desktop content and is perfectly adequate for occasional tasks on the second PC. However, there is a delay of under a second before the image from the PC is displayed on the notebook (which yu will notice when moving the mouse or type text).
If the desktop or tower PC does not have an HDMI output, an additional adapter is required: either from DVI to HDMI or from VGA to HDMI: this must be an active converter that digitizes the analog signal. VGA also provides FULL HD resolution, depending on the graphics card installed in the source PC.

VGA to HDMI converter (ca. $10)
For the test we used a cheap and simple setup for video capture to view the PC’s screen on the notebook’s display. A video capture card with HDMI-to-USB function costing $20 EUR and a VGA-to-HDMI converter (if needed) costing 10 EUR.
We used the free VLC player app to display the screen of the second PC, while the mouse and keyboard remained connected to the source PC for control. This setup can be further optimized with a better capture card. Upgrading the graphics card on the source PC can also improve the video quality, with a preferred resolution of 1920×1080 pixels (Full HD) to match the output of the capture card. Some other capture cards, such as the Elgato 4K X, support 4K output if the PC’s video card supports it and the notebook can display it.

