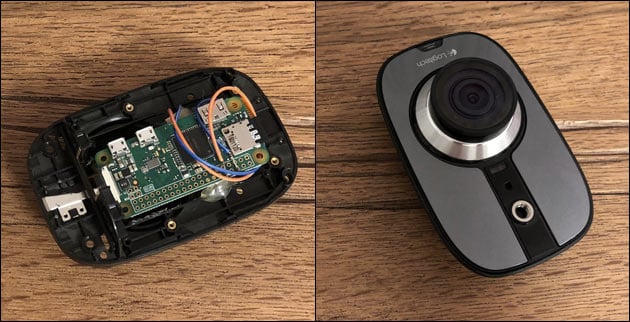
„Repair“ your Logitech Alert security camera!
12/23/2018 (8345x read)
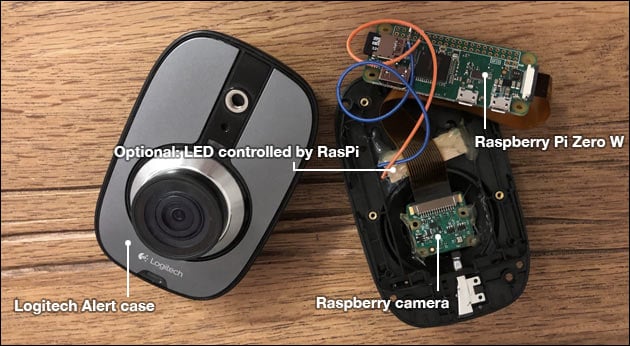
Have you bought one of the Logitech Alert security cameras that stopped working after a short period of time? 2 out of 3 of our cameras did so – and because Logitech stopped selling and supporting the „Alert“ camera, there is no big chance to get them working again. If your camera is not found anymore with the Alert Commander Software and resetting or trying a different SD card didn’t work, there is a high chance that your camera is dead, too.
There are companies that offer a camera repair on Ebay, but we did a low-cost upgrade to use the old case instead of really repairing them. Instead of the old Logitech hardware we installed a 10 US$ Raspberry Pi computer: This way you can add your own software later to tailor your newly upgraded Logitech camera exactly to your needs.
This camera upgrade brings also high resolution pictures or real HD video: Therefore we have to open the case and threw out everything that was inside the camera to replace everything with a Raspberry Pi Zero W and a Raspberry Pi camera module (be sure to take the newer 2.1 module with an eight megapixel sensor!): This is small computer with a Linux OS, Wi-Fi and Bluetooth: You can later install many additional software to get the pictures or a video-stream or even motion recognition. If you want, you can also solder LEDs to the Raspberry to get the LEDs in the Logitech Alert case working again!
How to open the Logitech Alert case
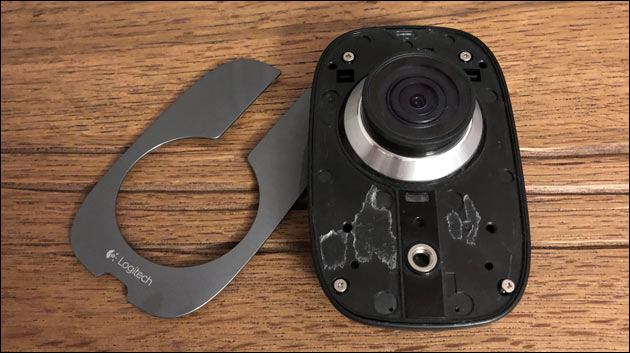
The case holds together with four tiny screws which hide under the light-grey front-plate: To remove it, you can carefully get a knife or a small screwdriver underneath it. After taking away the glued plate you can see the screws to open the Logitech Alert case:
Now you can take out the first (green) board to access the second (black) board:
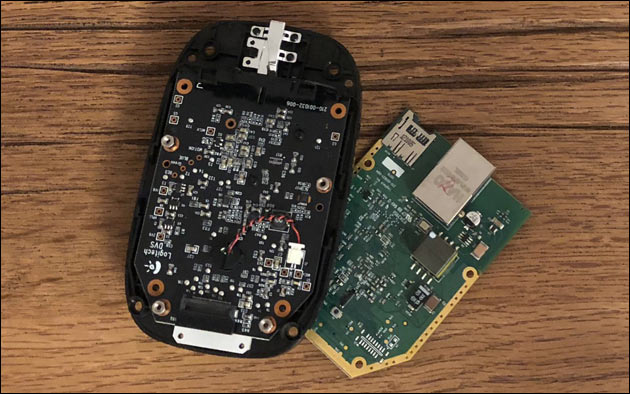
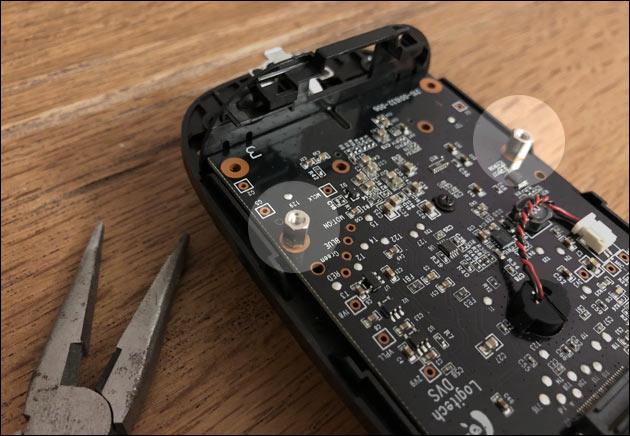
To remove the black board, you might need a pliers to unscrew the four metal distance holders:
After removing everything from the inside, you can connect the Pi camera to the Raspberry and place it in the old camera’s lens-hole – to fix it, you can use a hot glue gun (but be careful that you don’t damage the camera-board: use the glue only at the sides and don’t put the hot glue onto the electronics!). Before inserting the microSD card into the Raspberry, you need to download and install the (free!) software.
Installing the camera software
Raspbian is a widely used, free operating system for the Raspberry Pi. It is a special ARM version of Debian Linux and works fine on the small computer. You can get it on the offical Raspberry download page. After downloading the image file, you can insert the SD card into your PC (directly or with an USB adapter) and format the micro SD card. After formatting you can install the OS image with ApplePiBaker (on a Mac) or Etcher (for Windows, Linux and Mac).
Instead of Raspbian there is also an out-of-the-box operating system that turns the Raspberry into a security camera: MotionEyeOS will be fine for most use-cases of the new Pi camera:
If you are already an advanced Pi user and are going to use Raspbian, you have to copy an empty textile with the name „SSH“ (no file extension!) onto the SD card to activate the SSH connection and also a textile with the name „wpa_supplicant.conf“. Open it in notepad and insert this text:
ctrl_interface=DIR=/var/run/wpa_supplicant GROUP=netdev
update_config=1
country=US

network={
     ssid="Your WIFI name (SSID)"
     psk="Your WIFI password"
     key_mgmt=WPA-PSK
}
After copying this file to the micro sd card you can insert it in the Raspberry Pi and connect it to the power source: It will boot up and you should find it’s IP address in your router. This way you can connect via SSH and make your first image with the new camera with this command:
raspistill -o image.jpg
To retrieve and view this image, you might want to install a FTP server on the raspberry or the Apache http server: Then you can write your own software to access the camera images via a web browser.
Done: After setting everything up, the Raspberry Pi fits nicely in the case and leaves enough space to solder additional LEDs to the Pi-board later.
